My home network was a black box until I built a Grafana Prometheus network dashboard and suddenly had every metric I’d ever wanted staring back at me from a single screen. CPU across every node, bandwidth in and out, disk I/O, ping times to 8.8.8.8 — all live, all beautiful, all free. If you’ve got a server running in your homelab and you’re not already monitoring it this way, you’re flying blind.
The honest reason most people don’t set this up isn’t that it’s hard — it’s that the tutorials make it look hard. You’ll find a lot of posts that assume you already know what a scrape interval is or what PromQL does. This one doesn’t. I’m going to walk you through the full Grafana Prometheus network dashboard stack from scratch, explain what each piece does, and give you five panels worth adding on day one.

What a Grafana Prometheus Network Dashboard Actually Does
The stack has three moving parts and they each do one job. Prometheus is a time-series database. It reaches out to your nodes on a schedule (the “scrape interval”), pulls a snapshot of every metric that node is exposing, and stores it with a timestamp. It’s like a camera taking a photo of your server’s health every 15 seconds.
Node Exporter is a small agent that runs on your Linux hosts and exposes the metrics Prometheus needs to scrape — CPU usage, memory, disk space, network bytes in/out, system load, and about 800 other things. You run one Node Exporter per machine you want to monitor. It doesn’t store anything; it just answers when Prometheus asks.
Grafana is the front end. It connects to Prometheus as a data source and turns raw numbers into the visual panels you actually want to look at. Gauges, line graphs, heatmaps, stat cards — you choose the layout, Grafana does the rendering. And critically, you don’t have to build dashboards from scratch. There’s a community dashboard library with thousands of pre-built templates you can import with a single ID.
The whole thing is open source, runs fine on a Raspberry Pi or a cheap mini PC, and costs nothing to operate. This is the monitoring stack that professional DevOps teams use at scale — just running at home lab size.
Hardware You’ll Actually Need
You can run this entire stack on surprisingly modest hardware. Prometheus and Grafana together idle at well under 500MB of RAM and nearly zero CPU when things are calm. A Raspberry Pi 4 with 4GB of RAM handles it comfortably, and so does any mini PC with an Intel N100 or better.
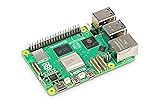
If you’re building out a dedicated monitoring node — or you just want something reliable that’ll run 24/7 without noise or power drain — the Raspberry Pi 5 (8GB) is a natural fit. It’s quiet, pulls about 5–8W at idle, and is more than powerful enough to run the full Prometheus stack plus Grafana plus a few other containers without breaking a sweat.
If you’re running this on an existing homelab box alongside other services, a Beelink EQ13 (Intel N100) is also excellent — it handles multiple containers, dual 2.5GbE for proper network monitoring, and runs cool enough to stay in a closet indefinitely. If you’re choosing what OS to run these containers on, our Proxmox vs TrueNAS comparison covers the two most popular homelab platforms.
Setting Up the Stack With Docker Compose
The fastest way to get a Grafana Prometheus network dashboard running is Docker Compose. If you’re new to Docker, our guide to 5 Docker containers every beginner should run first is worth a quick read before you dive in — Grafana makes a natural addition to that starter list. You define Prometheus, Grafana, and Node Exporter in one file, run one command, and they all start together with the right networking already configured.
Here’s a minimal docker-compose.yml that gets you started:
services:
  prometheus:
    image: prom/prometheus:latest
    volumes:
      - ./prometheus.yml:/etc/prometheus/prometheus.yml
      - prometheus_data:/prometheus
    ports:
      - "9090:9090"
    restart: unless-stopped

  node-exporter:
    image: prom/node-exporter:latest
    ports:
      - "9100:9100"
    restart: unless-stopped

  grafana:
    image: grafana/grafana:latest
    volumes:
      - grafana_data:/var/lib/grafana
    ports:
      - "3000:3000"
    restart: unless-stopped

volumes:
  prometheus_data:
  grafana_data:
You’ll also need a prometheus.yml config file in the same directory that tells Prometheus where to scrape:
global:
  scrape_interval: 15s

scrape_configs:
  - job_name: 'node'
    static_configs:
      - targets: ['node-exporter:9100']
Run docker compose up -d and all three containers start. Grafana is at port 3000 (default login: admin / admin — change it immediately). Prometheus UI is at port 9090 if you ever want to run raw PromQL queries.
Importing the Node Exporter Full Dashboard
Here’s where things get genuinely satisfying. Instead of building panels one by one, you import a community dashboard using a single ID. The community-built Node Exporter Full dashboard (ID: 1860) has over 4 million downloads and shows everything useful about a Linux host on a single page. It’s the closest thing to a reference monitoring dashboard the community has produced.
To import it: In Grafana, click the four-squares grid icon in the left nav → Dashboards → New → Import. Type 1860 in the “Import via grafana.com” field. Hit Load, select your Prometheus data source in the dropdown, click Import. Done. You now have a Grafana Prometheus network dashboard showing CPU usage, memory, filesystem, network I/O, and system load — all updating in real time.
For network-specific monitoring, also import dashboard 13978 (Node Exporter Quickstart) — it’s newer, cleaner, and the network panels are easier to read at a glance.
The official Grafana dashboard library has thousands more templates for everything from Docker containers to router SNMP stats — worth browsing once you’ve got the basics running.
5 Grafana Prometheus Network Dashboard Panels Worth Adding First
The pre-built dashboards are great starting points, but once you’re comfortable you’ll want to customize. Here are the five panel types that actually tell you something useful about network health:
1. Network Receive/Transmit Rate — Uses the PromQL query rate(node_network_receive_bytes_total[5m]) and its transmit equivalent. This is your bandwidth graph: are you pushing gigabits or kilobits? Is something on the network spiking unexpectedly at 3am?
2. Blackbox Probe (Ping/HTTP) — Add the prom/blackbox-exporter container and you can ping external hosts (8.8.8.8, your ISP gateway, your own domain) on a schedule. This turns Prometheus into an uptime monitor for anything reachable from your network.
3. Network Error Counter — rate(node_network_receive_errs_total[5m]) shows whether your NIC is dropping or erroring packets. A flat zero is good. Any sustained non-zero line means something’s wrong — a bad cable, a flaky switch port, or a misconfigured NIC.
4. Active TCP Connections — node_netstat_Tcp_CurrEstab gives you a headcount of open TCP connections on the host. Useful for spotting unusual connection counts from something that shouldn’t be chatty.
5. Internet Speed (Speedtest Exporter) — Add ghcr.io/miguelndecarvalho/speedtest-exporter to your Compose stack and you get scheduled speedtest results piped into Prometheus. You can graph your actual ISP speeds over time and spot the 6pm throttling that your ISP swears doesn’t happen.
Storage for Your Monitoring Stack
Prometheus stores metrics as time-series data on disk. By default it keeps 15 days of data. For a homelab with a few nodes, that’s roughly 1–5GB depending on scrape interval and number of metrics. It’s not huge, but you want it on something reliable — not an SD card, which will eventually corrupt under constant writes.
An SSD thumb drive like the Samsung T7 Shield Portable SSD plugged into a Pi or mini PC gives you fast, durable storage for Prometheus data volumes without complicating your setup. It’s also easy to migrate your monitoring data to a new machine if you ever rebuild.

- GO THE DISTANCE: Withstand whatever adventure with the wildly reliable T7 Shield; It’s designed for the elements with water1, dust2 and drop3 resistance—all, of course, at lightning speeds
- YOUR CONTENT CAPTURED: Take on the project, then transfer all your heavy files within seconds with the USB 3.2 Gen 2 Portable Solid-State Drive; Compatible with PC, Mac, Android devices, gaming consoles and more
- SHARE IDEAS IN A FLASH: The T7 is embedded with PCIe NVME technology that brings you fast read and write speeds up to 1,050/1,000 MB/s4, making it almost twice as fast as the T5
- MAKE ROOM FOR MEMORIES: Forge your own path with a full range of storage capacities; Keep all your prized files in one place with options from 1TB to 4TB; Pack in more personal content or store your biggest tasks on this palm-sized SSD
- BRAVE THE ELEMENTS: Get it done, rain or shine. With an IP65 rating for water1 and dust2 resistance, this SSD is ready to rough it; So even when you’ve got a dreary-day deadline, you can keep your projects in perfect condition
The Takeaway
A Grafana Prometheus network dashboard turns your homelab from a collection of boxes you hope are working into a system you can actually observe. The three-component stack — Node Exporter collects, Prometheus stores, Grafana displays — is genuinely beginner-friendly once you understand what each piece does. And importing dashboard ID 1860 means you’re not starting from a blank screen.
The whole stack takes about 30–45 minutes to get running the first time. After that, you’ll wonder how you ever ran a network without it. Start with the Docker Compose setup, import the Node Exporter Full dashboard, then start adding custom panels as you learn what questions you actually want answered.
Your Turn
What’s on your Grafana dashboard that you couldn’t live without? Drop it in the comments — I’m always looking to add new panels to the stack. And if this helped you get set up, share it with the homelab friend who’s still doing everything blind.