I canceled my 1Password subscription eighteen months ago and haven’t looked back. Not because I switched to another SaaS service — because I learned how to self-host Vaultwarden Docker on my homelab, and now my entire password vault runs on hardware I own, encrypted, synced to every device, and costs me exactly zero dollars per month. If you’re paying $36–$60 a year for a password manager and you’ve already got a server or even a Raspberry Pi sitting around, this is one of the best uses of 20 minutes you’ll spend this year.
Vaultwarden is an unofficial, open-source reimplementation of the Bitwarden server API written in Rust. It’s compatible with every official Bitwarden client — the browser extensions, the iOS and Android apps, the desktop apps, the CLI — all of it just works, pointing at your server instead of Bitwarden’s cloud. You get the same interface, the same autofill, the same vault organization. What you don’t get: a monthly bill or reliance on a third party to keep your passwords safe.

Why Self-Host Vaultwarden Docker Instead of Just Using Bitwarden Free?
Fair question. Bitwarden’s free tier is genuinely solid — unlimited passwords, cross-device sync, browser extensions. So why bother self-hosting at all?
A few reasons. First, Bitwarden’s premium features — TOTP code generation inside the vault, emergency access, encrypted file attachments, organization sharing — cost $10–$40/year. In Vaultwarden, those are all included at zero cost. It’s one of the reasons the self-hosting community adopted it so fast.
Second, when you self-host Vaultwarden Docker, your encrypted vault data lives on your hardware. Bitwarden uses end-to-end encryption so their servers never see your plaintext — but if Bitwarden shuts down or gets breached, you’re dependent on their response. When it’s your server, you control the backups and the upgrade schedule.
Third, Vaultwarden is tiny. The official Bitwarden server requires 11 Docker containers and 4GB of RAM minimum. Vaultwarden is a single container that idles at around 50MB of RAM. It’ll run on a Raspberry Pi Zero 2W.
What You Need Before You Start
The prerequisites are straightforward:
- A Linux server or mini PC with Docker installed (x86 or ARM64 both work)
- A domain name — even a free subdomain via DuckDNS works fine
- HTTPS — required because Vaultwarden uses the Web Crypto API, which browsers disable on non-HTTPS origins
- A reverse proxy to handle SSL (Nginx Proxy Manager is the easiest option)
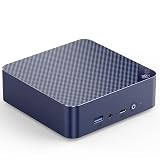
If you’re setting this up on dedicated hardware, the Beelink EQ13 mini PC (Intel N100) is the go-to recommendation for a low-power always-on homelab host. It runs 24/7 on under 10W, handles Docker with room to spare, and has dual 2.5GbE for proper networking. It can run Vaultwarden, Pi-hole, Uptime Kuma, and several other containers simultaneously without breaking a sweat.
- 【Beelink Latest Built-in Power Supply Mini PC】Beelink EQ13 Intel N100 (4C/4T, 6MB Cache, up to 3.4GHz), TDP up to 25W. Performance is up to 39% faster than N5105.All-New Built-in Power Supply devise Only one cable is needed for power supply, no external adapter is required, keep the desktop neat and clean.Light office, multimedia playback, virtual machine, NAS, meeting all your daily needs,Palm-sized Easy to carry everywhere, your ideal business trip partner
- 【Large Capacity】Beelink mini pc comes with single channel SODIMM 16GB DDR4 3200MHz memory and 500GB M.2 2280 SSD (expandable up to 2TB), Large capacity helps to save more large programes like PS, PR, DW, Ai and your favorite movies in the PC and brings quicker load times across your entire catalogue of apps and programs, less idle time waiting and more quality time for work and play
- 【Dual 1000Mbps LAN+ WiFi 6 + BT 5.2】Mini PC Dual LAN 1000Mbps Ethernet port design provides more applications, such as firewall, multichannel aggregation, soft routing, lag-free experiences in live streaming, file downloading and VR etc. WiFi 6 (802.11ax) provides a faster internet experience for browsing, streaming and gaming.Lower latency Bluetooth5.2 (AX101), more stable and efficient to connect to multiple wireless devices such as projector, printer, monitor, speakers and etc
- 【Multiple Upgrades】Beelink EQ13 Unibody chassis without vents on the top and sides adopt MSC2.0 Cooling System New airflow design utilizes air intake vents from the bottom,keeping the Mini pc cool and stable.Ultra Quiet Lower Fan speed ensures near-silent operation,New Dustproof Design The new filter at the bottom keeps dust out of the Mini pc,avoiding dust accumulation and dust-related issues
- 【Micro PC Connections】Beelink Mini computer with 1xFront USB-C Port (10Gbps),3xUSB3.2 Port (10Gbps), 1xUSB2.0 Port (480Mbps),Dual HDMI Port supports 4K Dual display (Max 4K@60Hz)4K Video,Browse Webpages,Multimedia playback ,expands multiple work-spaces for more efficient and comfortable productivity
Self-Host Vaultwarden Docker: The Full Setup
Here’s the minimal docker-compose.yml to get Vaultwarden running:
services:
  vaultwarden:
    image: vaultwarden/server:latest
    container_name: vaultwarden
    restart: unless-stopped
    volumes:
      - ./vw-data:/data
    environment:
      - DOMAIN=https://vault.yourdomain.com
      - SIGNUPS_ALLOWED=true
    ports:
      - "8080:80"
That gets Vaultwarden running locally on port 8080. But you can’t use it from another device until you add HTTPS. The recommended approach: add Nginx Proxy Manager to the same Compose file, point it at your domain, create a proxy host for vault.yourdomain.com pointing to the Vaultwarden container, and enable Let’s Encrypt SSL. The whole process takes about 10 minutes once you’ve done it once. The official Vaultwarden wiki covers every edge case if you get stuck.
Once it’s up, go to vault.yourdomain.com, create your account, then immediately flip SIGNUPS_ALLOWED to false in your environment. Then install the official Bitwarden browser extension, change the server URL to your domain, and log in. Done — you’re running your own Bitwarden-compatible vault.
3 Security Steps You Shouldn’t Skip
1. Disable open signups immediately. Set SIGNUPS_ALLOWED=false after creating your account. Otherwise anyone who finds your domain can create a vault on your server.
2. Enable 2FA on your vault account. Vaultwarden supports TOTP. Go to account settings in the web vault and set it up. Any TOTP app works — Aegis on Android and the official Bitwarden Authenticator are both solid choices.
3. Back up your vw-data folder automatically. All your vault data lives there. A cron job that syncs it to a second drive or to cloud storage via rclone is all you need. Running a self-hosted password manager without backups is genuinely risky — don’t skip this step.
What to Run It On Long-Term
Vaultwarden’s memory footprint is so small that even the cheapest always-on hardware handles it easily. But if you’re building out a full homelab stack and want serious headroom, the GEEKOM Mini IT13 (Intel Core i5-13500H) is worth the step up. Twelve cores, support for 32GB RAM, and dead quiet — it can run Vaultwarden, Grafana, Jellyfin, Home Assistant, and a dozen other containers without any of them competing for resources.

- ➊ [All in One Mini PC for Business, Education & Digital Signage] Need a compact PC for office work, classrooms, digital signage, or light retail/warehouse use? The GEEKOM IT13 (Amazon's Choice) arrives with Windows 11 Pro pre-installed, ready to use out of the box. It supports smooth multitasking across four displays and can even run popular games like League of Legends and Fortnite on lower settings – versatile enough for work and play
- ➋[Built to Last with 3-Year Warranty for 24/7 Operation] Why settle for 1-year warranty when you can have 3? The geekom IT13 delivers 2-3 times the average lifespan of competing models, thanks to superior materials, precision engineering, and rigorous testing. Multi-certified (FCC, UL, ENERGY STAR, CE, RoHS) for safety and energy efficiency – buy with confidence, backed by our long-term commitment
- ➌ [ABS+PC Metal Frame, 440lbs(200kg) Pressure Rated] Unlike plastic-frame mini desktop, the geekom IT13 features a reinforced ABS+PC composite shell with a precision-machined metal frame and baseplate – tested to withstand up to 440 lbs (200kg) of static pressure. Tool-free upgrades, shock-absorbing feet, and a multi-directional antenna enhance durability and wireless performance. Perfect for warehouses, retail, and heavy-use settings
- ➍[16GB RAM + 1TB NVMe SSD for Photo Editing & Creative Multitasking] Photo editing, run multiple applications, and multitask like a pro. The silent operation mini pc packs 16GB RAM (upgradeable to 96GB) and a 1TB PCIe Gen4 NVMe SSD – up to 75% faster than Gen3. Need more storage? Add an M.2 2242 SATA SSD (up to 4TB) plus a 2.5" SATA HDD (up to 4TB). Easy upgrades, anytime
- ➎ [WiFi 6E + 2.5GbE + USB4 for Lag-Free Gaming & 8K Streaming] Next-gen tri-band WiFi 6E (2.4/5/6GHz) delivers ultra-fast, low-latency wireless. 2.5G Ethernet provides blazing wired speeds. Bluetooth 5.2 pairs instantly with headsets, mice, and keyboards. Plus, dual USB4 ports support 8K output and eGPU connections – drive two 8K + two 4K displays simultaneously. Perfect for gaming, streaming, and ultra-sharp visuals
The Takeaway
When you self-host Vaultwarden Docker, you’re not just saving $36 a year — you’re taking real ownership of one of the most sensitive pieces of your digital life. Your passwords live on your hardware, encrypted, accessible from every device through the official Bitwarden clients, with premium features included at no cost. The setup genuinely takes 20 minutes if you’ve already got Docker running somewhere.
The ongoing maintenance is nearly zero — Vaultwarden updates are a one-liner: docker compose pull && docker compose up -d. It’s one of those self-hosting projects where the effort-to-payoff ratio is almost embarrassingly good. If you’re new to Docker-based self-hosting, our guide to 5 Docker containers every beginner should run first pairs perfectly with this one — Vaultwarden makes an obvious first addition to that list.
Your Turn
Already running Vaultwarden? What reverse proxy are you using, and what else is in your container stack? Drop it in the comments — always curious how others have set up their homelab stack around it.